Scan-to-BIM
You need a Revit model of an existing building, but the drawings are outdated and modeling from a raw point cloud is eating your team's design hours.
FieldScan converts registered LiDAR point clouds into Revit BIM models at LOD 200, 300, or 400 — modeled to the specs your team actually builds with, delivered in 2–4 weeks for typical mid-rise commercial buildings.
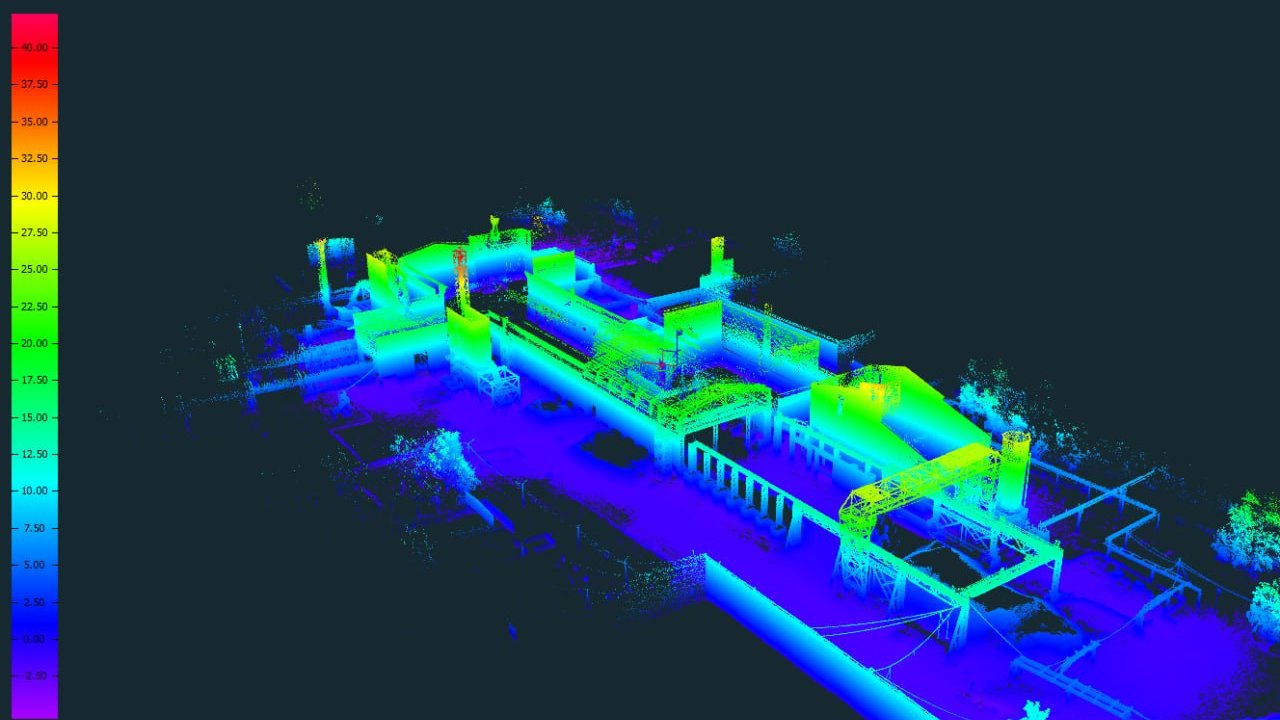
You send
- Our scan, or your registered point cloud (E57 or RCP)
- Required LOD and disciplines: architectural, structural, MEP
- Your Revit version and template, if you have one
- What the model will be used for: design, permit, coordination, or facility management
You receive
- Revit (.rvt) model at requested LOD, MEP/Arch/Struct disciplines as scoped
- AutoCAD 2D plans, sections, and elevations from the model
- IFC export for non-Revit downstream tools
- Registered point cloud (.rcp) linked into the Revit file for verification
- Model accuracy report comparing model geometry against scan data
Timeline depends on
- Building size and number of disciplines modeled
- Required LOD: higher LOD means more modeled elements
- Point cloud quality and coverage, if the scan is not ours
- Confirmed in the written scope before you commit
Scan-to-BIM is the process of converting a registered LiDAR point cloud into an intelligent, parametric BIM model — typically in Autodesk Revit — where each modeled element carries the geometry, dimensions, and metadata downstream design and construction workflows need.
FieldScan handles scan-to-BIM as either a bundled service (we scan and model) or as a modeling-only engagement against your existing point cloud data. The deliverable is a Revit file your in-house team can open the next morning and start designing against. For design practices navigating existing conditions, our solutions for architects deliver coordinated models structured directly to your firm’s Revit template.
When scan-to-BIM is the right tool
Scan-to-BIM earns its budget on three project types:
Retrofits and renovations of existing buildings. Original drawings are rarely accurate after decades of changes. Scan-to-BIM gives the design team a verified as-built starting point — slab elevations, column locations, MEP routing, ceiling heights — so design decisions are based on what’s actually there, not what someone hoped was there. Because original drawings are the least reliable input of the three project types here, retrofits carry the highest ROI: every dimension the scan gets right is a field-verification trip and a change order avoided.
MEP coordination and prefabrication. A registered scan paired with an LOD 400 model lets fabricators cut to known geometry instead of field-verifying every dimension. Pre-fab assemblies arrive and fit. On healthcare and industrial work, this routinely saves 5–15% of MEP schedule.
Heritage documentation and adaptive reuse. Historic buildings often lack any digital record. Scan-to-BIM creates one in a format that permits, drawings, and future work can build on. The City of San Diego’s historic districts (Gaslamp Quarter, Sherman Heights, Burlingame) all see this regularly.
The handoff problem most teams underestimate
The single biggest hidden cost in scan-to-BIM isn’t modeling hours — it’s the mismatch between what the modeler produces and what the downstream team can use. A model at LOD 300 with categories the receiving Revit template doesn’t recognize, or with worksets that don’t match the firm’s standards, is a model that gets rebuilt.
FieldScan scopes every job with a kickoff call that confirms your template, your worksets, your level names, your view conventions, and your model element categories. The model arrives matching them. We’ve yet to have a client need to rework a delivered file to fit their project setup.
What drives scan-to-BIM cost
Scan-to-BIM is scoped by the work the model actually contains, not by hours on a clock. Six factors move a quote:
- Modeled area. Cost scales with the square footage you model, not the square footage you scan — you can capture a whole floor and model only the core and shell.
- LOD level. Moving from LOD 200 (generic geometry) to LOD 300 (field-verified dimensions) to LOD 350/400 (connection- and fabrication-level detail) raises modeling hours sharply. LOD 400 across an entire building is the most common way teams overpay.
- MEP density. A packed mechanical room or a Sorrento Valley lab ceiling carries far more geometry per square foot than open office, and MEP is where most modeling time goes.
- Disciplines in scope. An architectural shell alone is a fraction of architectural, structural, and MEP modeled and coordinated together.
- Source-data quality. A clean, well-registered point cloud models faster than one that needs re-registration first — about one imported dataset in five does.
- Rush and access. Compressed schedules and phased or occupied-site handoffs add coordination overhead.
We quote fixed-fee once scope is confirmed, so the number doesn’t move while we work. Because LOD is the single biggest lever, the BIM LOD levels guide is worth reading before you set scope.
Typical timelines from registered point cloud to delivered Revit file:
| Building size | LOD 300 | LOD 400 |
|---|---|---|
| <20,000 sqft | 7–10 days | 14–18 days |
| 20,000–60,000 sqft | 12–18 days | 21–28 days |
| 60,000–120,000 sqft | 18–28 days | 4–6 weeks |
| >120,000 sqft | Custom scoping | Custom scoping |
What you receive
Every scan-to-BIM delivery includes:
- The Revit (.rvt) model at the agreed LOD, structured per your firm’s template
- The linked, registered point cloud (.rcp) so your team can verify any element against scan data
- A model accuracy report showing measured deviations per element category against the source point cloud
- AutoCAD-format 2D extracts (plans, sections, elevations) generated from the model
- An IFC export for non-Revit downstream tools
- A handoff session — typically 30 minutes — to walk your project lead through model organization and any noted field conditions
Quality gate before delivery
Before any Revit file leaves our shop, it passes a fixed QC checklist: correct shared coordinates, level names matching scope, no orphan or unplaced elements, all model categories assigned, workset structure matching client template, accuracy report attached. The checklist is in every project SOW so there’s no ambiguity about what “done” means.
Matching the model to the decision it supports
Not every project needs a full BIM model, and not every model needs high LOD. The right scope starts broad and narrows to what each decision actually requires.
If a team only needs dimensioned floor plans for a permit set, 2D CAD drawings extracted from the scan — not a full parametric model — are the faster, cheaper answer. When the work is genuinely three-dimensional — clash avoidance, MEP routing, structural analysis — a Revit model earns its cost. Within BIM, LOD 200 suits early space planning, LOD 300 is the right default for design development on a retrofit, and LOD 350/400 belong only where elements feed fabrication or tight coordination. Paying for connection-level detail across a whole building, instead of on the MEP that needs it, is the mistake we correct most often at scoping.
The BIMForum LOD Specification is the industry reference for these definitions; the BIM LOD levels guide applies them to real scoping decisions.
Scan-to-BIM across San Diego County
FieldScan delivers scan-to-BIM from San Diego, serving all of San Diego County, with projects across Orange County, Riverside County and the Inland Empire. The modeling process is identical wherever the building is; what changes locally is the kind of work that needs it.
Sorrento Valley and Torrey Pines lab and biotech tenant improvements are MEP-dense, and a fit-out’s feasibility usually turns on a verified as-built model rather than decades-old record drawings. Campus and institutional facilities are built in phases and rarely fully documented, so an accurate Revit baseline pays back across every later project. And Southern California’s seismic-retrofit work — driven by statewide standards and local ordinances targeting older concrete and soft-story buildings — needs a structural model that matches the building as it stands, which is exactly what scan-to-BIM produces.
Related services
Scan-to-BIM works best as the second stage of a bundled engagement: 3D laser scanning captures the field reality; scan-to-BIM converts it into a usable design artifact. For roofs, facades, and site context a tripod can’t reach, FAA Part 107 compliant drone surveying fills the gaps, and when a project needs a certified boundary or topographic survey, our land surveying service delivers it through a licensed California PLS partner. The BIM LOD levels guide explains the LOD framework in depth — read it before scoping if your team is new to LOD-based contracts. For buildings whose paper records need to feed that same model, Facility Document Digitization brings legacy drawings and O&M manuals into the same coordinated dataset.
Tell us what you’re modeling and we’ll tell you the right LOD and scope. Get a scope and quote.